USA
USA Canada
A Guide for Contractors, Carpenters, and DIY Homeowners

Radiant floor heating is one of the most efficient and comfortable ways to heat a home. But if you’re new to it, one of the first questions that comes up is who actually installs it?
Is it the plumber? The mechanical contractor? Or can the general contractor, or even the homeowner, handle part of it?
The answer depends on the system type and where you are in the construction timeline. Fortunately, modern radiant panel systems have made installation much more flexible, opening the door for carpenters, builders, and even handy homeowners to take on much of the work while leaving the hydronic portions to licensed professionals.
Understanding How Radiant Floor Heating Systems Are Installed
Hydronic radiant heating uses warm water circulating through PEX tubing to heat the floor from below. That heat radiates upward into the living space, providing consistent comfort and eliminating cold spots.
Every installation has two main parts:
- The radiant panel and tubing: the physical system that distributes heat across the floor.
- The mechanical components: including the boiler (or heat source), manifolds, pumps, valves, and controls that circulate and regulate the water.
Depending on your background, one or both of these phases may fall within your expertise.
Who Installs the Panels?
This is where radiant panel systems shine. Traditional in-slab systems require a concrete pour with tubing tied to rebar or wire mesh, work that’s generally left to the concrete and plumbing trades. But panel-based systems, which install over wood or concrete floors, can be installed using basic carpentry skills and tools.
That means:
- Carpenters, framers, and general contractors can easily handle panel layout, fastening, and PEX installation.
- Homeowners and DIYers with basic construction experience can also participate in panel installation, especially in remodels or single-room projects.
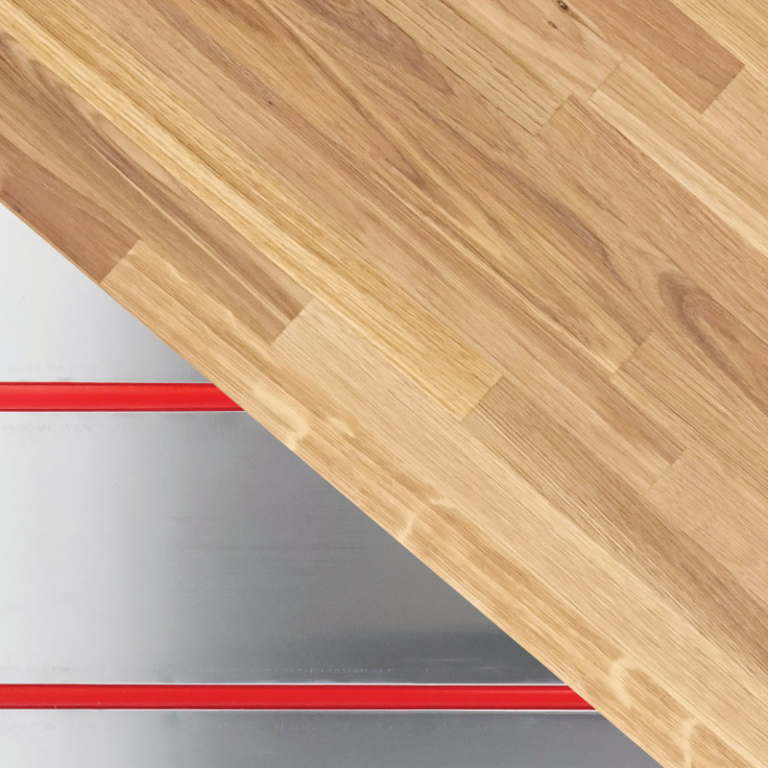
The process is similar to laying subfloor or underlayment. Panels are fastened directly to the substrate, interlocked in place, ( the panels don’t interlock as there is a space between them) and cut with standard tools. Once the layout is complete, PEX tubing is pressed into the channels, no concrete, specialized tools, or messy adhesives required.
Who Installs the Mechanical Components?
While panels can be a carpentry-friendly task, the hydronic system should always be installed by a plumber or mechanical contractor.
This includes:
- The boiler or water heater connection
- The supply and return lines
- The manifolds that distribute water to each zone
- The pump, expansion tank, and control system
These components involve pressure, temperature control, and safety considerations that require professional knowledge. Most building codes also require mechanical permits for this portion of the work.
A Typical Radiant Floor Heating Installation Timeline

Knowing when radiant components fit into the build schedule helps avoid delays and ensures proper coordination among trades. Here’s a typical timeline for a panel-based hydronic radiant floor heating installation:
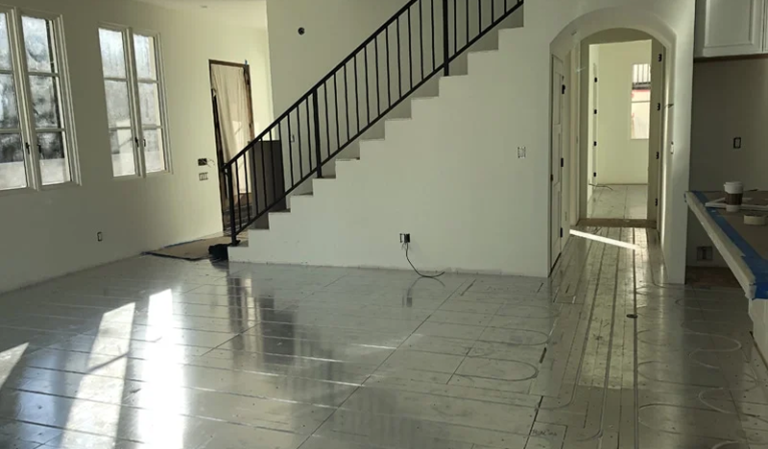
1. Rough-In Stage – Before Drywall
During this stage, supply and return lines are run from the mechanical room to the manifolds. The manifolds are usually installed in accessible wall cavities or utility areas.
This phase is handled by the plumber or mechanical contractor, often at the same time as other rough-in mechanical work, HVAC ducts, plumbing, and electrical lines.
At this point, no panels or tubing are installed yet. The goal is to have the distribution ready and pressure-tested before walls are closed.
2. Post-Drywall Stage – Panel and Tubing Installation
Once drywall is up and the interior is clean, the radiant panels can be installed. This phase typically happens right before finished flooring goes down.
- Panels are fastened to the subfloor or concrete surface.
- PEX tubing is pressed into the channels.
- Tubing circuits are connected to the pre-installed manifolds.
Because no wet materials are used, other trades can continue working in adjacent areas. The panel installation process is quick, clean, and doesn’t require curing time.
3. Finish Flooring Stage
After the tubing is pressure-tested and approved, the finished floor covering—whether tile, engineered wood, vinyl, or carpet is installed directly over the radiant panels.
From this point, the mechanical contractor can commission the system, balancing flow rates and verifying that the heat source operates within design parameters.
Why Panel-Based Systems Make Scheduling Easier
Panel systems simplify the overall build schedule because they separate mechanical rough-in from floor installation.
For contractors, that means:
- No waiting for a slab to cure before proceeding.
- Fewer conflicts with drywall or flooring crews.
- The ability to keep jobs on schedule even if the mechanical contractor is delayed.
Homeowners doing remodels benefit as well; installation can be done in phases without disrupting other parts of the home.
Can Homeowners Install Radiant Floor Heating Themselves?

In many cases, yes; at least part of it.
Homeowners with moderate construction skills can install radiant panels and even lay the PEX tubing as long as a licensed professional connects it to the heating source and manifold.
That shared approach is one of the biggest reasons above-floor radiant panel systems have become popular in remodel and retrofit projects. DIYers can save on labor while ensuring system safety and code compliance through a licensed plumber.
When panels come pre-routed for standard tubing spacing and include aluminum heat transfer surfaces, the layout process is straightforward. The system design, often provided by the panel manufacturer, guides the installer through each circuit, ensuring balanced loops and efficient coverage.
The Role of EPS and System Efficiency
WBI’s panels incorporate EPS (expanded polystyrene) insulation beneath the aluminum layer. This built-in insulation ensures that heat is directed upward into the living space rather than being absorbed by the subfloor or concrete slab below.
For contractors, this eliminates the need to add separate insulation layers. For homeowners, it simplifies installation and maximizes energy efficiency.
EPS-backed panels are particularly valuable in basements or over concrete floors, where downward losses are most significant. The insulation improves overall response time and reduces energy waste, an easy win for both comfort and performance.
Product Spotlight
WBI’s family of radiant panels is designed to make installation accessible to everyone, from experienced contractors to first-time DIYers. Their systems feature routed aluminum surfaces for fast, efficient tubing installation and EPS-insulated options for concrete or uninsulated floors.
Each project begins with a custom layout drawing, helping installers know exactly where each panel and loop belongs. Panels can be installed after drywall and before finish flooring, using only basic tools and standard fasteners, keeping the jobsite clean and efficient.
Meanwhile, the hydronic connections are left to the pros, ensuring the system performs safely and reliably for years to come.
Final Thoughts
Radiant floor heating doesn’t have to be complicated. With modern above-floor panel systems, installation is flexible, clean, and approachable for multiple trades, and even for homeowners who want to take part in their project.
Carpenters and general contractors can handle panel and tubing installation with ease, while licensed plumbers or mechanical contractors complete the hydronic hookups. The result is a coordinated process that fits neatly into standard construction timelines, avoids jobsite conflicts, and delivers lasting comfort.
By understanding who does what, and when, contractors and homeowners alike can enjoy the full benefits of radiant floor heating: warm, efficient, and beautifully integrated comfort from the ground up.