Tile Over Radiant Heating Boards
Cost Effective Installation of Tile Over Radiant Floor Heating Boards
This radiant floor heating article is designed to communicate a quality and cost effective method of installing ceramic tile over radiant floor heating board systems. The system shown below is straight forward and avoids using unnecessarily expensive and complex products.
Overview of Materials:
All materials expand and contract at different rates and with tile it is particularly important to accommodate this in a quality installation over radiant heating boards. Radiant floors typically go through a range of floor temperatures depending on the amount of heat loss occurring at the time.
In moderate weather the floor temperature may only be a few degrees hotter than the room temperature but in extreme heat loss conditions it could under certain circumstances be as much as 15°F hotter than the room temperature. The co-efficient of thermal expansion of the radiant board substrata and ceramic tile are not the same. Properly installed tile is very durable but will be prone to cracking if provision is not made to account for the differing expansion of these layers of materials.
By utilizing a flexible crack isolation membrane this challenge can be cost effectively solved and also provide, with proper installation and material choice, protection from moisture getting into the substrata. Since tile is so frequently installed in locations that are prone to moisture such as bathrooms and kitchens this moisture protection is important.
Suggested Installation Method for Tile over Radiant Floor Heating

The system described above is the cost effective system that our company recommends for our Ecowarm Radiant Board. But it is generic enough that, with small common sense changes should be applicable to most infloor radiant board systems.
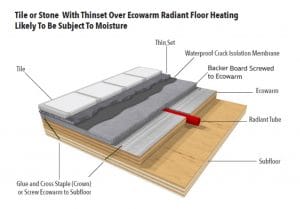
In the drawing the radiant board is attached to the subfloor using, preferably, a low VOV green construction adhesive glue on the bottom along with screws or cross staples from a sheathing stapler at the eight attachment points. Cross stapling means putting 2 staples at opposing 45 degree angles close to each other. Cross stapling along with the bottom side glue makes for a very secure and squeak resistant installation of the board. The next step is installing cementitious backer board over the radiant board. It may be ¼” .3/8” or ½” depending on the needs of matching other floor heights.
How to have a record of where the tubing is:
Before installing the backer board a thick sheet of clear plastic should be cut to size of the room or area to be installed with the backer board. Using a permanent marker make a template of where the tubing runs are. The plastic template can be unrolled and used to locate where to snap lines that will locate the tubing to avoid screwing through. Taking photographs of the tubing installation is a good idea also. The backerboard may be installed to the radiant board using modified thin set and screwed to the radiant board.
The hydronic tubing should be under an air pressure test during the installation so that if a puncture occurred it would be found. To date we have not found a modified thin set that is incompatible with the PEX pipe used in the radiant board but it is always good to check with the PEX manufacturer as well. There are other PEX pipe compatible adhesives such as Bostik Greenforce that can be used to adhere backerboard to our radiant board but are more expensive than thin set. Remember all glues take longer to set on aluminum since only one of the two surfaces is absorbent. Once the backerboard is attached to the radiant board, an anti-fracture membrane should be installed over it.
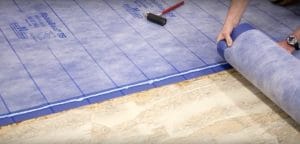
We recommend products from the Noble Corporation since they were early supporters of the radiant floor heating industry and trade groups called and have very radiant savvy tech support people. They make a range of appropriate products but the one we recommend is called Noble Seal TS which performs as a crack isolation or antifracture membrane and when properly installed adds water proofing of the substrata. Properly installed and rated in TCNA approved tests as High Performance, it will accommodate up to 1/8” differences in the expansion and contraction of the layers thus preventing cracking of the tile.

Photo courtesy of The Noble Company
The anti-fracture membrane is made from an extruded CPE sheet layer pf polyester fiber bonded to either side. TS may be installed on the cementitious backboard in two ways. The first way is with modified thin set mortar which requires a cure time before the installation of the tile, or in the case of Noble Seal TS there is an adhesive called Nobel Bond EXT that can be used that has enough tack that tile may be installed using modified thin set on it, without the additional cure time. The membrane may be made waterproof by lapping it 2”and using a waterproof sealant such as NobleSealant 150 to bond the overlap.
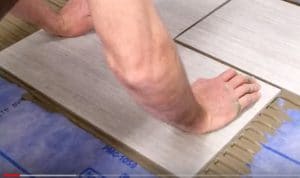
There are other brands with anti-fracture membranes and a family of related products where the installation would be similar. Lastly, tile is usually thin set to the anti-fracture membrane and after an appropriate drying period grout is applied.

